Veghead's i-opener page
1 Intro
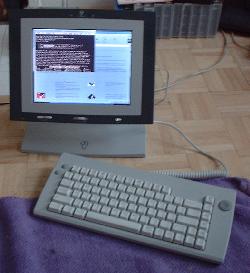
On a recent visit to the states I picked up a $99 i-opener. Back in the UK I set about putting Linux on it.
This quick guide is an attempt to summarise a lot of info on the i-opener found on the various discussion lists, but particularly
http://www.kenseglerdesigns.com/cgi-bin/UltraBoard/UltraBoard.pl
Its not designed to do it for you, just to get you pointing in the right direction and hopefully to stop you making the same gaffe as me in asking a FAQ to the list ("I cant get root on my i-opener - why ?" See section 2 for the answer.)
If you get stuck, Check the FAQ. If its not there, search on the board. If not
then post it.
You're supposed to be hacking it - so hack!
First Things First
Firstly, read the FAQ.
Some of the info is slightly out of date.
Next find out what version i-opener you have by reading the section 2 below.
If you have a version with the nobbled BIOS (almost certainly) you will not be able to boot from a disk that doesnt have the geometry 490/2/32. If thats going to be a problem
for you then you'll need to flash downgrade your BIOS.
See section 3 for info on how to do it.
2. Guide to i-opener versions
Guide based on posting by Linuxguru
V1: Shows 'nothing but net' boot screen, tutorial in male voice, no
goop
on BIOS, IDE header intact. No BIOS downgrade necessary.
V2: New boot screen, tutorial in male voice, goop on BIOS
(sometimes), IDE
header has pins clipped (sometimes), will not boot generic HD. Badflash V1
BIOS will work, QNX Root password is known to be osiw$6.4, use either the
QNX drive image trick or login as root to transfer qnxflash to downgrade
it to V1 (details in other threads).
V3: New boot screen, tutorial in female voice, goop on BIOS
(always),
IDE
header intact, will not boot generic HD. QNX Root password unknown, Shadow
password file missing. Either Badflash or the QNX drive image trick with
CMOS settings as 490/2/32 can be used to downgrade it to V1.
V3B: New boot screen, tutorial in female voice, goop on BIOS
(always), IDE
header intact, Torx screws on stand mount, will not boot generic HD. QNX
Root password unknown, Shadow password file missing. Changes in component
layout near SODIMM. QNX drive image trick with CMOS settings as 490/2/32
can be used to downgrade it to V1. (Possible limitations on the kind of
drives for which the trick works - older drives < 100 MB have higher
probability of success.)
V4: Same as V3B, but with Rise PR266 CPU and Hitachi screen. At the
moment, the best bang for the buck, since there are possible CPU upgrades
beyond 300 MHz. Same procedure to downgrade as V3B. QNXFLASH might need to
be a more recent version due to problems with Rise.
V5: Dated 7/7/2000. New BIOS image. Sound chip replaced by Analog Devices AC97
(AD1881A) chip. Datasheets at http://www.analog.com/pdf/preview/AD1881A_0.gif
New SANdisk image.
3. Flashing the BIOS
How I flashed my V4
I can't claim any cred for discovering this - all info was gleaned from the
board. Please look at the board. Really.
Of course, you could always avoid this section and get a V1 BIOS
from Badflash. Much easier
but not half as much fun...
This method also works for V3.
- Open the Box. You will need something to deal with the torx screws.
I used a screwdriver and brute force. The last one wouldn't budge and so
in a fit of brutal,mindless frustration I yanked it off. It cracked very cleanly
and no damage was done. Nonetheless I'd buy some TORX drivers if I were you.
They're well useful anyway. In the UK you can get these anywhere, Maplin, RS etc. In the US use digikey (www.digikey.com - PN XPTX600-ND).
- Get hold of a v2 qnx image from www.freedrive.com. User: iopener, Pass:
iopener. If you have a V4+ you will need the later image with qnxflash version
102 - using v1 will do nasty things.
- Get your laptop IDE drive and plug it into a PC. To do this you will need
an adapter that converts 44-pin 2mm IDE to standard 40-pin IDE. These are
available everywhere, I got one at the geek-fair for 6 quid.
- Booted the linux PC. At the LILO prompt give the kernel the following
parameter:
hdc=490,2,32
eg If your normal LILO config is called 'Linux' at the boot prompt you
would type:
boot: Linux hdc=490,2,32
Obviously if your laptop drive is not the secondary master you will need
to change the 'hdc' to the correct drive.
This parameter makes linux believe the geometry of the drive is 490,2,32 and
ignores the results of the drive probe.
- copied the v2 image file to the disk with
gzip -dc <gzipped_v2_image_file> | dd of=/dev/hdb
- Plug the laptop drive into the iopener. Of course for this you will need a
nobbled cable. I cant tell you how difficult it was to get a 44-way cable in the UK. I highly recommend buying the MOD kit.I ended up paying
a fortune by getting two laptop IDE cables from Miles Ind.Electronics in the UK. (http://www.milesie.co.uk/ - very, very nice people BTW - very helpful and a very quick delivery). I then joined them together with a male to
male adapter from digikey (www.digikey.com PN 3M1244-ND). This gives the
same effect as swapping all of the pairs of leads...without the immense hassle.
- Switch on i-opener and CTRL-ATL-ESC to get into the BIOS setup. Of course you will need a "proper" keyboard to do this as the IO one doesnt have ESC.
- Setup the BIOS:
- Goto "Standard CMOS Setup"
- Change drive C to None
- Change drive D to 490,2,65535,489,32,NORMAL
- In "BIOS Features Setup" - change the boot sequence to "D,A,SCSI"
The above is not full of typos. Despite the HD
being primary master, unless you setup the BIOS in
this rather bizarre and illogical way you will not be able to boot off
the HD. Instead you will get the dreaded "DISK BOOT FAILURE".
I don't know why...someone like to tell me ?
- Boot the i-opener off the hard-disk!
- Bring up the QNX root prompt via the TAB,4444 method. (see
FAQ)
- Move to the right directory by typing:
cd app/ztest
- Enter the command "ls -al" to check to see if the files are all there.
You should see: qnxflash, and the bios_image_256k.bin and some others.
- Start the flashing with the command:
qnxflash -w bios_image_256k.bin
- If all goes well, reboot and you will have the V1/2 BIOS with all of
its different piccies, graphics and security holes.
4. Installing Jailbait
At this point you can boot of the hard-disk with normal geometry. This
is what I did next.
- Put the laptop HD into a PC and DOS-formatted it. I used DOS
because it's really very small and dead quick to install. As I was
going to wipe it after this anyway, Linux would have been overkill...
especially if the only command I wanted to use was dd...
- Then copied DOLLY.EXE and the uncompressed jailbait image to it.
- Put the laptop into the IO and set both drives to "Auto" in the BIOS
- Rebooted the IO and it came up in DOS
- Copied the jailbait image to the SANdisk with
dolly <jailbait_image_file> HD129:
- Rebooted - and Hey Presto, Linux on the IO!
5. Other useful links
Recent i-opener hack page with downloads!
http://www.joe.flintaero.com/iopener/
i-opener discussions
http://www.kenseglerdesigns.com/cgi-bin/UltraBoard/UltraBoard.pl
Linux hacking guide including mod kit
http://www.linux-hacker.net/imod/imod.htmlo
FAQ
http://fastolfe.net/misc/i-opener-faq.html
Original Linux i-opener site
http://i-opener-linux.net/old
Google Links
http://directory.google.com/Top/Computers/Hardware/Systems/I-Opener/
Jailbait: Tiny Linux distribution for sandisk
http://jailbait.sourceforge.net
Details on downgrading.
http://www.samfundet.no/~wiesener/iopener/
Adam Lotz describes how he did it.
http://www.adamlotz.com/iopener.html
Back